Creating Seamless Audio CDs
Last updated on 3/30/2016*This tip applies to pyro Audio Creator, pyro Audio Creator LE and TDK Life on Record Vinyl Recorder.
Have you ever heard a music CD that seems to flow from track to track without a pause or a gap? Whether you are creating ambient music, a mix CD, or one large audio track that needs to be divided up into multiple CD tracks, there are several scenarios where you may want seamless transitions between each track. Unlike many of the CD burning programs that ship standard with CD burners, pyro Audio Creator and TDK Vinyl Recorder have the ability to create seamless audio CDs that blend into each other without interruption.
Note for Audio Creator users - Before following along with this tech tip, please make sure you have the pyro Audio Creator 1.5.2 patch installed, which introduces the DAO (Disc At Once) burning capability. There are two different versions of the Audio Creator patch available. Click below to download the correct patch:
Audio Creator Full
Audio Creator LE
Compiling the Audio CD Project
Audio Creator users will need to launch the "Editor" module from the Toolbar.
Vinyl Recorder users need to launch the "Recorder" module from the Toolbar.
Next, you will need to bring in the various audio files. If you are exporting your project from SONAR or Music Creator you should export 44100/16bit WAV files, which is the CD Audio (Redbook) standard. Go to File | Import, browse to the location of your music and choose the file(s) from the list.
Note – You can bring in multiple files by holding down Shift or Ctrl.
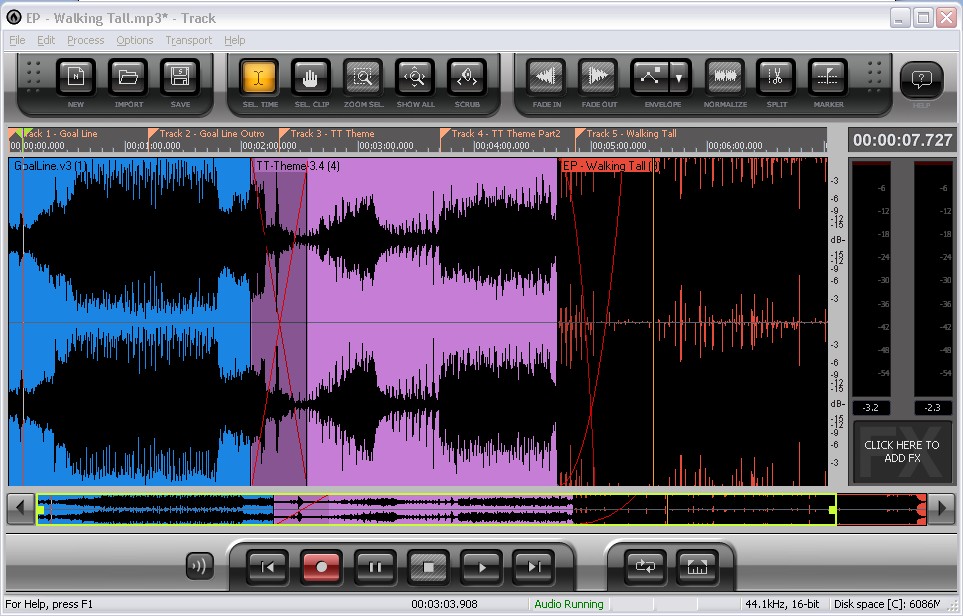
For this example I am importing 3 separate files. I want to make sure each song fades into one another.
I can create a cross-fade by simply dragging the waveforms in the timeline with the Select Clip tool  so that the clips' beginning and endings overlap. The cross-fades are represented by the red and white lines that look like a large “X”. You can adjust the fades by grabbing onto the small triangles in the upper corners of the waveform. You can also right-click on these triangles for a variety of fade types.
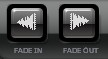
Note – These fades are not the same as using the “Fade Tools” which will destructively change the volume of the File.
Use the Fade Tools only when fading a track in or out that is not overlapping another track.
Adding Track Markers
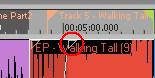
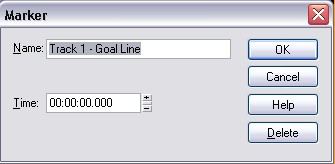
Now it’s time to decide where each track will come in. You can easily move the green Now Marker  by clicking up in the Timeline, then press F11 to add the Track Marker. I name my tracks with the track number plus the name of the song. It is very important that you rewind to the beginning of the project (W) and add your first track marker there. You can always edit the position or name of the marker by right-clicking to bring up the Marker Properties.
Because this CD requires 5 tracks, I will be placing the markers at song transitions and also at the middle of some of the waveforms. See below:
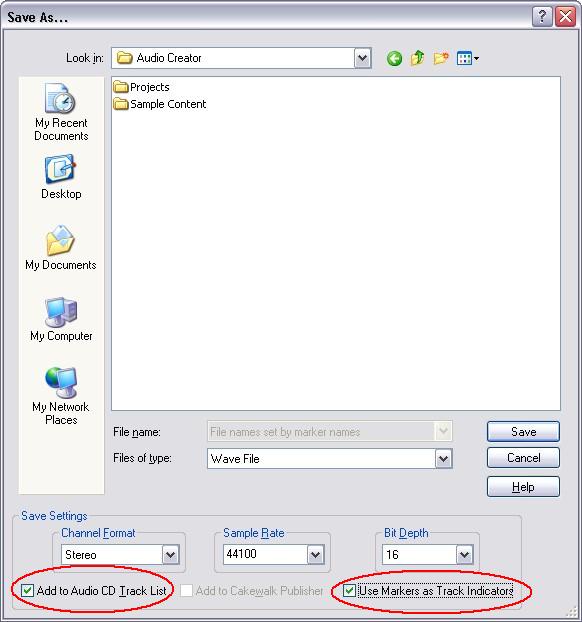
Now that the markers are in place and your edits have been made, it’s time to Export the project as multiple tracks for CD burning. First, go to File | Save As – “Project” in order to retain your edits. Next, go to File | Save As – “WAV”. This will bring up the “Save As” dialog window. Once you change your sampling rate and bit depth to CD Quality (44100/16bit) you will see that the boxes “Add to Audio CD Track List” and “Use Track Markers as Track Indicators” will become available. Check them both. There is no need to name the file because it will use the Track Markers for file names. See figure below…
Burning the CD
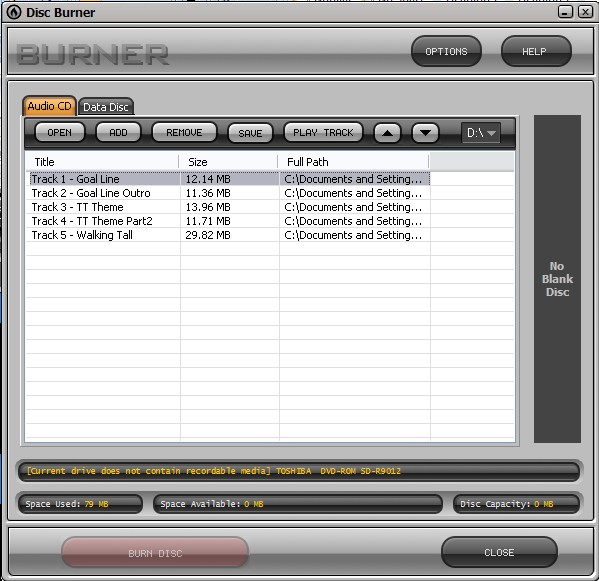
Once you click Save you should see the “Disc Burner” module pop up with the track names already populated. You have the option to burn either a Data CD or Audio CD, we will leave it on “Audio CD”. Choose your drive under the drive dropdown list.
Before inserting the blank disc and starting the burn, click the “Options” button up top. Make sure you set the “Write Mode” to either Automatic or one of the DAO options. The seamless burning is made possible by Audio Creator 1.5’s various Write Modes. Audio Creator supports the following write modes:
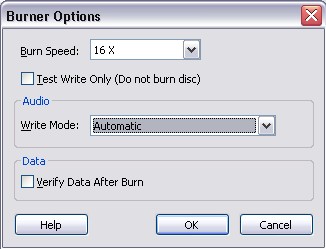
Automatic (default). This is the recommended setting. Audio Creator automatically selects the optimal write mode for the current burner and media. In most cases Disc At Once Raw PW is used. If the current burner does not support Disc At Once Raw PW, then Disc At Once PQ mode is attempted, followed by Session At Once and lastly Track At Once.
Track At Once (TAO). Each audio track is recorded separately to the disc. The laser is turned off and on again between tracks and there is a two second gap between all tracks. Additional tracks can be added to the disc after it has been recorded as long as the disc is not full. TAO discs can contain both data and audio at the same time.
Session At Once (SAO). Session At Once is similar to Disc At Once (DAO), but only the current session is closed and the disc is not finalized.
Disc At Once - PQ (DAO PQ). The entire disc is recorded in one pass without turning off the laser between individual audio tracks. The disc is finalized after recording, so you can not add additional tracks to the disc later.
Disc At Once - RAW PW (DOA RAW PW). Like DAO PQ mode, the entire disc is recorded in one pass without turning off the laser between individual audio tracks and the disc is finalized after recording. This mode is preferred by certain drive manufacturers and is included for compatibility reasons.
You should now have a finalized Audio CD capable of being played back on any modern Audio CD player. Sit back, relax and enjoy your seamless mix CD.